Masking in Resolume — From First Mask to Group Combos
Masking in Resolume comes down to one idea: white reveals, black hides. Put a black-and-white clip on a layer, set the blend mode to 50 Mask, and your content shows through the whites while the blacks go transparent — the fastest way to blend clips into looks that plain layer stacking can't touch.
Prefer to watch? Here's the full masking tutorial — concept to group masking, plus a rapid-fire look at the Masker Aid plugin at the end. Keep scrolling for the written walkthrough.
The Concept: White Reveals, Black Hides
Think of a black-and-white mask clip as two channels you can use. The white parts show the clip underneath; the black parts give you transparency, which lets other content blend through. That's it — everything else in masking is built on this.
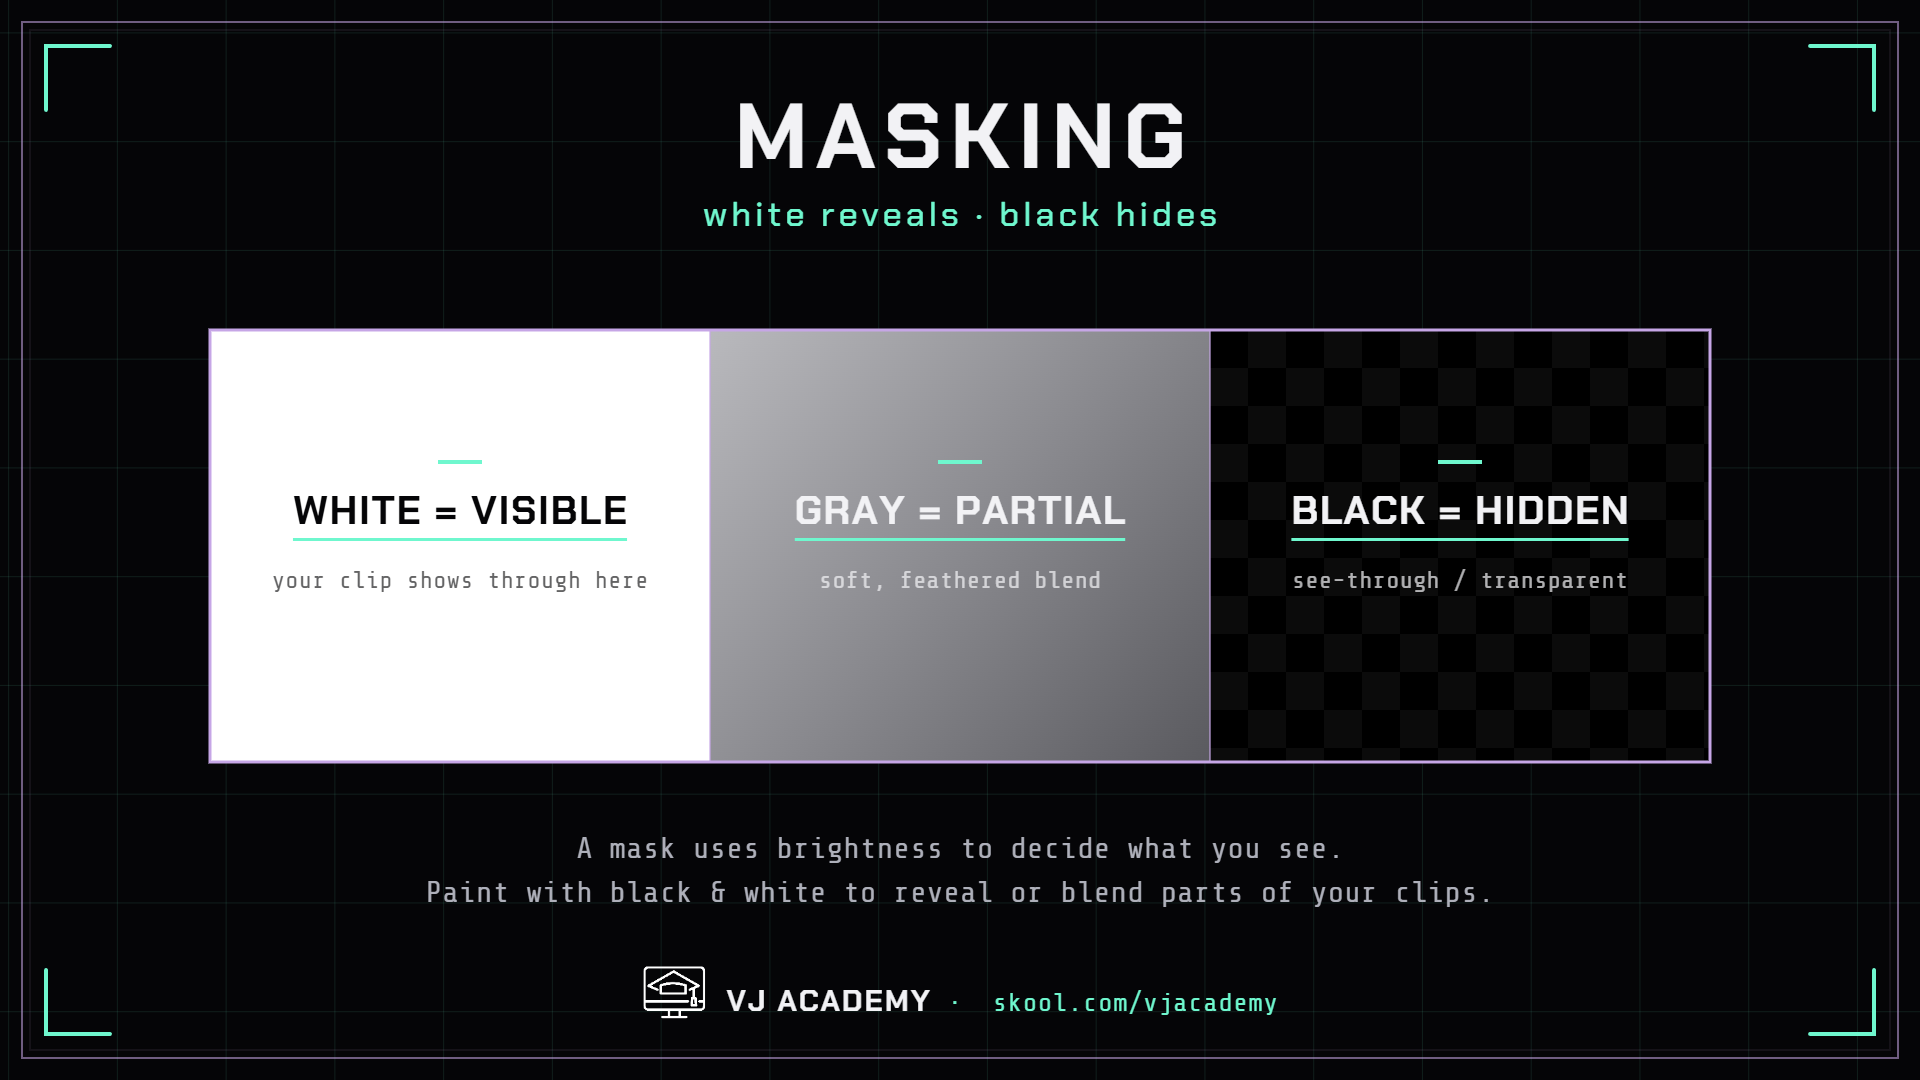
Try it: put a black-and-white clip on a layer above your content. On the default Alpha blend mode, nothing comes through. Switch the layer's blend mode to 50 Mask — the blend mode built for masking, with the absolute whites and blacks you want — and now the white shows your image while the black goes transparent. Fire a second clip on a lower layer and watch how the mask splits the two. (Need a refresher on blend modes first? Lesson 7 covers them all.)
Mask Mode: One Below vs All Below
There's a second way to run a mask that doesn't touch the blend mode at all. Right-click the masking layer → Mask Mode, and you get two options:
- One Below — the mask affects only the single layer directly underneath it. The white shows that layer; the black stays transparent so layers further down show through. One of Rex's favorite ways to mask.
- All Below — every layer underneath gets packaged as one and masked together. Worth knowing: All Below is essentially the same thing as setting the blend mode to 50 Mask.
Keep a Dedicated Masking Layer
Rex keeps all masks on one designated layer, and it pays off three ways: every mask lives in one spot (no hunting through the composition mid-set), the whole layer is easy to grab and drag for different blending combinations, and you can drop it exactly where it needs to sit — inside a group, or underneath your logo layer so the logo never gets masked by accident.
Build a Generative Mask from Sources
Resolume's built-in Sources are mask gold. Pick a source, stack effects on it, and you've got an infinite supply of animated black-and-white masks. The one from earlier in the beginner course: a Lines source, a Slide effect with its Y on a looping timeline, then a Polar Kaleido on top — a repeating generative donut that loops forever. Swap in a Hexagon Pixelate for instant variation, and audio reactivity is always on the table (Lesson 6).
The Colorize Trick — Clean Blacks and Whites From Any Clip
Got a clip with gray tones that would make a muddy mask? Turn on a Colorize effect, set it to white, and boost the contrast — that gets you most of the way to absolute blacks and whites. If it needs one more punch, a Bright/Contrast effect finishes the job. This trick turns almost any content you like into a usable mask.
Your Logo as a Mask
One of Rex's most-used live techniques: throw your own logo in as a mask and let the content play through it. Instant custom branding with almost zero work — and if the logo isn't perfectly black-and-white, the Colorize trick above dials it in.
Auto Mask vs a Real Alpha Channel
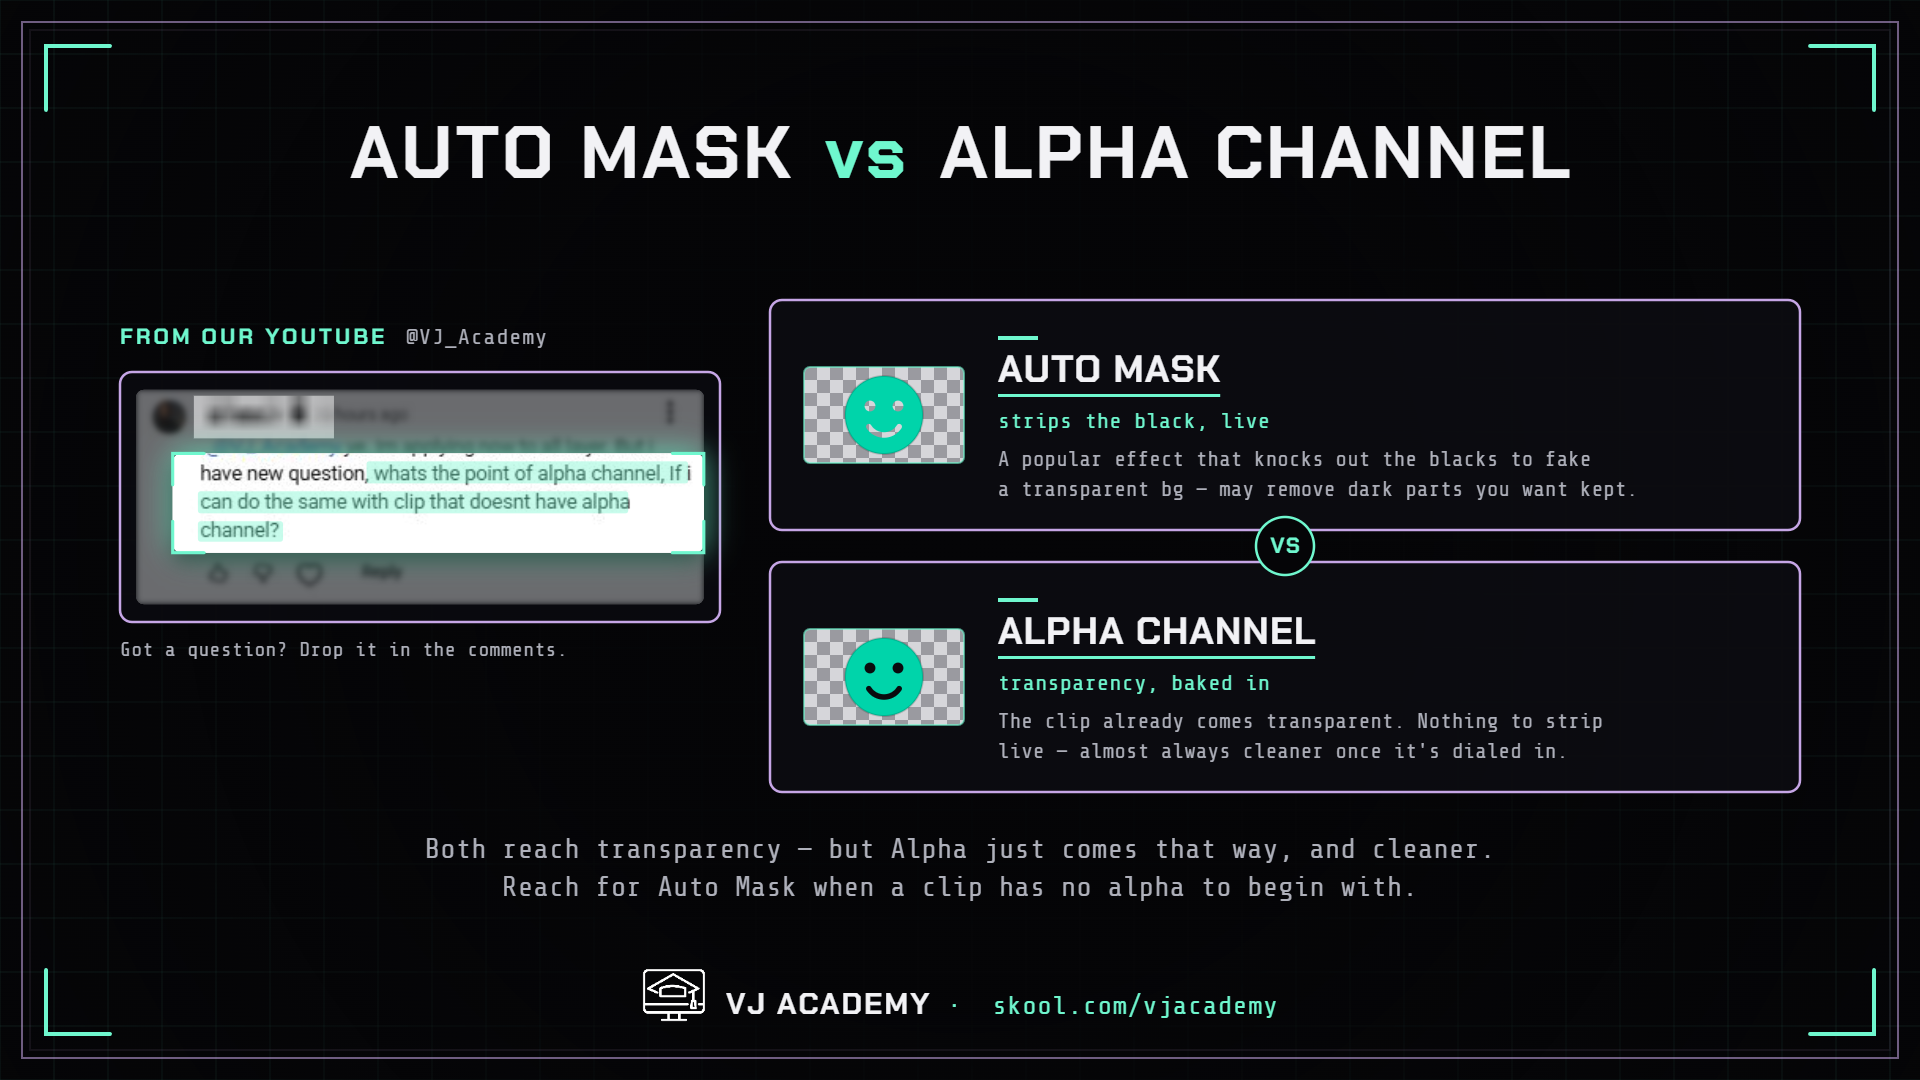
This one trips people up. If a clip's black background isn't going transparent, it probably has no alpha channel embedded. The quick fix is Resolume's stock Auto Mask effect — drop it on the clip, then adjust its contrast from the clip panel to dial in the transparency.
But Auto Mask isn't perfect: it works by removing dark parts of the clip, which can eat content you didn't intend to lose. A clip with a real embedded alpha channel is much cleaner — the transparency is baked in, so Resolume knows exactly what should be see-through. Check the clip panel: clips are often labeled "with alpha" or "no alpha" (not 100% of the time, but worth a look).
Advanced: Hierarchy Swaps and Group Masking
Here's how Rex actually runs masks in his live sets. With loose layers, put the mask on One Below and just swap which layer sits underneath it — dragging layers around the hierarchy gives you quick, dramatic variations of the same mask.
The next level is masking inside a group (new to groups? Lesson 9 covers them). Make a new Group, drop in the mask, your foreground, and your mid layer — and leave the background outside the group. Now the mask packages everything inside the group into one unit, and that whole masked combination interacts with the background outside it. That's a blend you simply can't build with loose layers.
If it's not clicking yet, that's totally fine — this is a more advanced concept. The best thing you can do is go play: mix up the hierarchy, swap what's in the group, move where the mask sits, change the effects. The more you toy with it, the faster you'll spot the patterns worth saving for your live sets.
Cheat Sheet
- The rule: white reveals, black hides
- Fast mask: B&W clip on a layer → blend mode 50 Mask
- Mask Mode: right-click layer → One Below (single layer) or All Below (= 50 Mask)
- Clean up any clip: Colorize → white + boost contrast → Bright/Contrast if needed
- No transparency? Auto Mask as the quick fix; real alpha channels are cleaner
- Group combo: mask + fore + mid inside the group, background outside
What's Next
Masking pairs naturally with the rest of the toolkit:
- Blend Modes — the foundation 50 Mask builds on
- Layers — the hierarchy moves that make mask swaps fast
- Custom Transitions — the same designed-not-default philosophy, applied to clip changes
- Effect Stacks — save your favorite mask builds as reusable stacks
New to Resolume entirely? Start from the top with the beginner course or the big-picture How to Become a VJ guide.
Frequently Asked Questions
How does masking work in Resolume?
White reveals, black hides. A black-and-white clip on a layer set to the 50 Mask blend mode lets your content show through the white parts while the black parts stay transparent — so you can reveal just sections of a clip, or blend clips together in ways plain layer stacking can't.
What's the difference between One Below and All Below in Mask Mode?
Right-click a layer → Mask Mode. One Below masks only the single layer directly underneath, leaving lower layers visible through the black areas. All Below packages every layer underneath as one and masks the whole stack — it's essentially the same result as setting the mask layer's blend mode to 50 Mask.
How do I turn any clip into a clean black-and-white mask?
Use the Colorize trick: drop a Colorize effect on the clip, set it to white, then boost the contrast — and if it needs one more push, add Bright/Contrast on top. That crushes the gray tones toward absolute whites and blacks, which is what makes a mask read cleanly.
Should I use Auto Mask or a clip with a real alpha channel?
A real alpha channel is cleaner — the transparency is baked into the clip, so Resolume knows exactly what should be see-through. Auto Mask fakes it by removing dark parts of the clip, which can eat content you didn't intend to lose. Check the clip panel: many clips are labeled 'with alpha' or 'no alpha.'
Why put a mask inside a Group in Resolume?
A group packages the mask and the layers inside it into one unit — so the masked combination can then interact with layers outside the group. Rex's setup: mask, foreground, and mid layers inside the group, background outside. That unlocks blend combinations you can't get with loose layers alone.
Questions about a specific masking setup? Drop a comment on the YouTube video above, ask inside the Academy, or email vjacademy@outlook.com.